

13 August 2020
When I tried to integrate my son’s MP3 player into our openHAB system to control it with our everyday household app, I found that it was fairly easy to do so. In fact, I got much more than I was hoping for…
You can get an idea of this project in the accompanying Youtube video. However, more details and all the code are presented in this blog post.

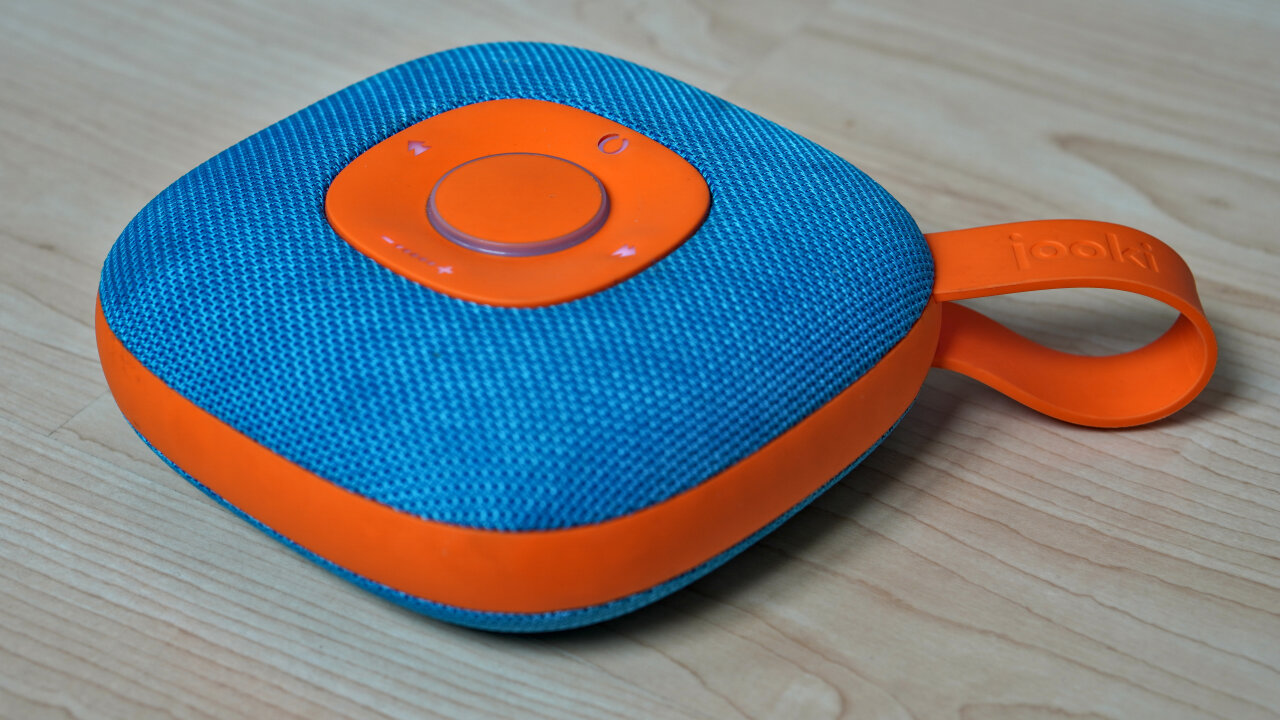
So, what is a Jooki? A Jooki is an MP3 player similar to your Bluetooth music box that is designed to be easily used by very young children. The idea is that the parents (i.e. me) can upload MP3s to the device, assign them to playlists and then associate these playlists with some little plastic1 figures. The kid takes one of the figures, places it on the glowing ring and thanks to the magic of NFC, the associated playlist starts playing. In fact, my son learned to play his favorite song long before he learned to walk.
This concept is not necessarily new and there are some other similar solutions out there, but in contrast to most other commercial products the Jooki allows me to buy my music wherever I want. Of course I would have prefered an Open Source / Open Hardware DIY solution like the Phoniebox, but I did not feel confident to build a case that withstands the biting, sucking and drooling of my then one year old son.

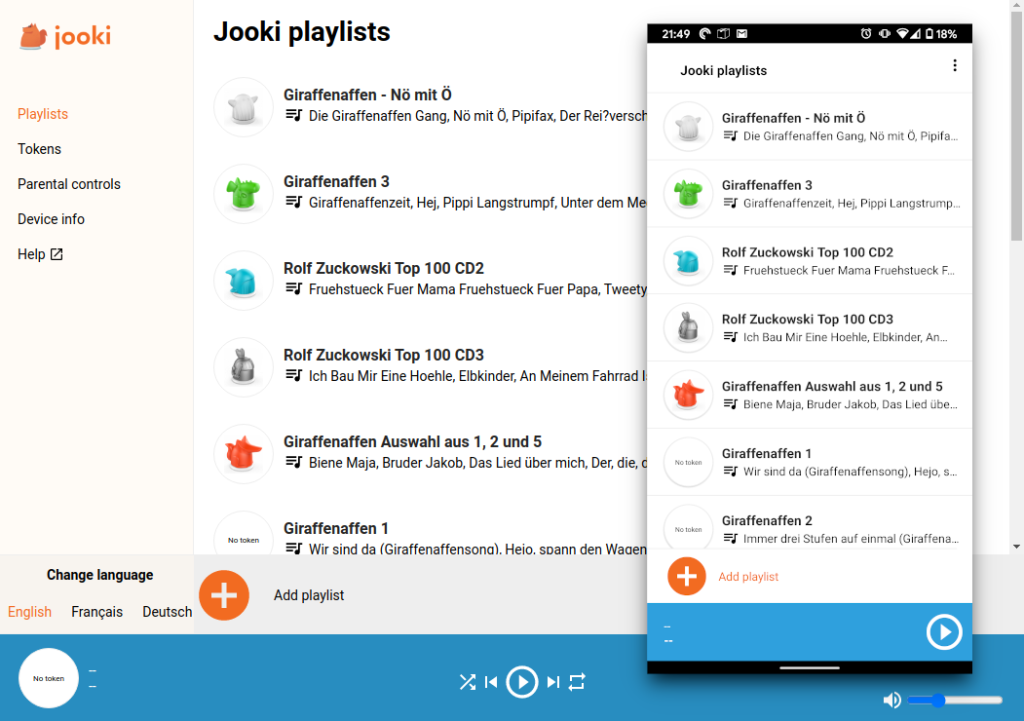
Of course with the closed source of a commercial device it took not too long before I felt a bit limited in my options. I mean, the Jooki has several control options out of the box, but just not exactly what I wanted. Officially, there are three main methods to control it:

They mostly work ok, but the app tends to hang or crash once in a while and it is just another app on my phone which feels crowded anyways2. Same goes for the web interface which feels a bit cumbersome for some simple tasks, especially if I want to issue a few commands to the Jooki while putting my son to bed. And of course I wanted more control: A more easily accessible battery indicator, a quick button to start the bedtime playlist and maybe some means to automate a thing or two eventually.
So, it is time to take over control. There is a web interface after all. How hard could it be to imitate its communication? Not hard at all. Super easy. Barely an inconvenience.
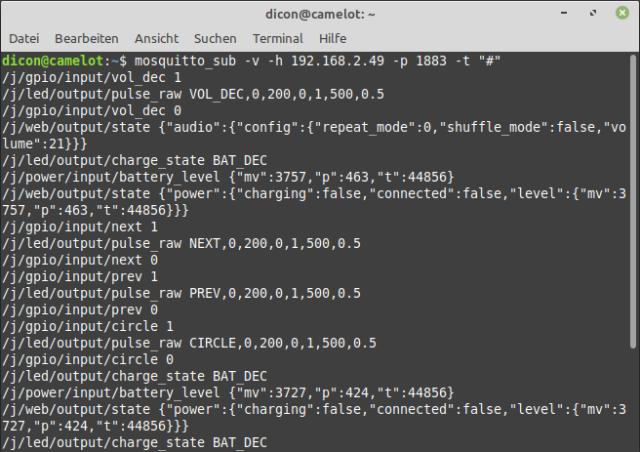
When I looked into the communication I found immediately that the web interface was talking to the Jooki via MQTT over web sockets. Jackpot. At that point I would already have been satisfied. But then I checked if the Jooki would also accept a connection on the default MQTT port 1883 without web sockets and if I need any kind of token or if I need to establish some kind of session to send commands. Bingo. There is just a regular MQTT broker running on the Jooki on the default port in plain sight3. Let’s connect with a client (I used Mosquitto) and see what is happening over there.

Woah… That is one busy MQTT broker. I expected to see some MQTT messages between the web interface and the device, but it turns out that the device is communicating via MQTT all the time even if I control it with the buttons on the device itself. It sends status messages about pretty much everything. Charging, battery state, play events, playback position, button presses… every little interaction except for “looking at it” triggers an MQTT message. Of course, thanks to the web interface, I could also find MQTT commands for pretty much anything I wanted to do. I just had to trigger it in the web interface, look at the output of Mosquitto and take notes.
Let’s integrate some of the basic stuff into openHAB. To do so, we use the MQTT binding in openHAB and need to set up two “things”4 using the MQTT binding: The MQTT broker on the Jooki and the Jooki itself as a generic MQTT thing. The broker is simple: Set up a static IP5 for the Jooki (probably on your DHCP server, i.e. your router) and set that IP along with the default MQTT port 1883 for the MQTT broker thing with the MQTT binding in openHAB. You might also want to adjust the reconnect time to your liking as this device usually does not run 24/7 and you want to find a nice trade-off between spamming the network and your logs by trying to reconnect and not taking too long to connect to a freshly booted Jooki.

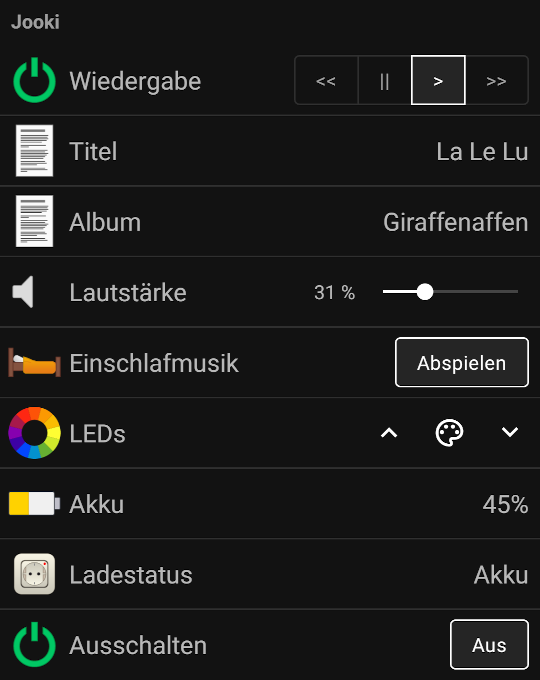
The other thing, the “generic MQTT thing” called “Jooki”, is where all the functionality is placed. We just need to create that thing and then add the desired channels to it. So let’s add battery, charging (boolean as in “is charging”), volume, state (player state: playing, pausing, etc.) and commands for play, pause, next, previous and shutdown. Finally, we also add info channels for the current album and track name, a channel to start a specific playlist and another one that we will discuss later… (This is the order of the screenshot below, which has some German labels because we run our openHAB app in German.)

To add functionality to each channel, we simply have a look at the output of Mosquitto and find that the Jooki sends updates on all topics for which we need an update. In fact, it uses the single MQTT topic /j/web/output/state for all the updates. Depending on what needs to be reported, the MQTT message contains a JSON object with different objects and variables. For example, it periodically informs about the battery level and charging state:
/j/web/output/state {"power":{"charging":false,"connected":false,"level":{"mv":3727,"p":424,"t":44856}}}In most cases, we can simply use the JSONPATH transformation from openHAB to pick out the value we need. So, for all channels that should receive updates, we just need to set the MQTT state topic to /j/web/output/state and an appropriate “Incoming value transformation”.

At the time of this writing, there are six channels that receive updates in my setup.
| Channel | MQTT State Topic | Incoming transformation |
|---|---|---|
| Battery | /j/web/output/state | JS:jooki-battery.js |
| Charging | /j/web/output/state | JSONPATH:$.power.charging |
| Volume | /j/web/output/state | JSONPATH:$.audio.config.volume |
| Playback state | /j/web/output/state | JSONPATH:$.audio.playback.state |
| Current album | /j/web/output/state | JSONPATH:$.audio.nowPlaying.album |
| Current title | /j/web/output/state | JSONPATH:$.audio.nowPlaying.track |
Boolean values6 like “charging” require true as “Custom On value” and false as “Custom Off value”, otherwise the JSONPATH should be sufficient with the exception of “battery”. Here, the Jooki reports a value in the range of zero to 1000, so we need to divide by 10, which we do in a JavaScript transformation (JS:jooki-battery.js):
1
2
3
4
(function(dataString) {
    var data = JSON.parse(dataString);
    return parseInt(data.power.level.p)/10.0;
})(input)
Commands are also straightforward. We just issue the desired command from the web interface to see the matching MQTT message and set it as a “Command Topic” in the channel configuration. If it requires a parameter, we can format this parameter in the “Outgoing value format” setting:
| Channel | MQTT Command Topic | Outgoing value format |
|---|---|---|
| Volume | /j/web/input/SET_VOL | {“vol”:”%.0f”} |
| Start playlist | /j/web/input/PLAYLIST_PLAY | {“playlistId”:”%s”,”trackIndex”:1} |
| Play | /j/web/input/DO_PLAY | |
| Pause | /j/web/input/DO_PAUSE | |
| Next | /j/web/input/DO_NEXT | |
| Previous | /j/web/input/DO_PREV | |
| Shutduwn | /j/web/input/SHUTDOWN | |
| Set all LEDs | /j/led/output/set_raw | ALL,%1$d,%2$d,%3$d |
With these channels, I can simply link some items and control everything from openHAB. I could create some rules (like limiting the volume7, starting the sleep playlist when closing the window shutters, shutting down the Jooki at a specific time etc.) and make them available in our openHAB app, which we use to control pretty much anything around our house.

So, at the moment, when I put my son to bed, I just turn on the Jooki and in the process of reading a bedtime story, I dim the light, close the rollershutters in his room, start the good night playlist on the Jooki and set an appropriate volume. All from a single app with one tap for each task8 without standing up and without distracting him by fidgeting with my phone for a while.
However, there is even more. Much more. There are so many MQTT messages flying around that I will certainly have to add a few more things in the future. Did you notice the /j/gpio/input/xxx y messages? Every button press on the device triggers an MQTT message with xxx denoting the button (next, prev, circle, vol_dec, vol_inc) and y being 0 or 1 representing the state of the button. How about allowing my son to control the garage door with the buttons on his Jooki? Let’s allow him to turn on the irrigation system by placing a specific figure. Not a good idea? Maybe not, but this opens up a lot of options for some entertaining additions in the future.
For now, I only did one entertaining thing that went beyond the specification of the device. If you use the Jooki, you notice that the buttons as well as the ring have lights that can change color. For some reason you usually only see white and two other colors there. However, every time a button is lid up, there is an MQTT message like /j/led/output/set_raw or /j/led/output/pulse_raw with some parameters. While the latter triggers a short “pulse” animation, the former simply sets the LED to a permanent RGB color. As a parameter we can apply the LED command to either a specific one (each of the five buttons or the ring) or to all LEDs at once. This is a nice tool in our openHAB app to fascinate our son or to turn off9 the LEDs when he is supposed to fall asleep.
I am not entirely sure why the Jooki does not use more colors from its color LEDs, but the first thing I had to do when I found that I had six RGB LED at my disposal was to write a little Python script to go into full disco mode.
1
2
3
4
5
6
7
8
9
10
11
12
13
14
15
16
17
18
19
20
21
22
23
24
25
26
import paho.mqtt.client as mqtt
import time
import colorsys

period = 5.0

def rainbowString(t):
    rgb = colorsys.hsv_to_rgb((t % 5.0) / period, 1.0, 1.0)
    return ",".join(str(round(x*255)) for x in rgb)

mqttc = mqtt.Client()
mqttc.connect("192.168.2.49", 1883)

mqttc.loop_start()
start = time.time()
now = start
while now - start < 20:
    now = time.time()
    mqttc.publish("/j/led/output/set_raw", "CIRCLE,"  + rainbowString(now + 0*period/5.0), 0)
    mqttc.publish("/j/led/output/set_raw", "NEXT,"    + rainbowString(now + 1*period/5.0), 0)
    mqttc.publish("/j/led/output/set_raw", "VOL_INC," + rainbowString(now + 2*period/5.0), 0)
    mqttc.publish("/j/led/output/set_raw", "VOL_DEC," + rainbowString(now + 3*period/5.0), 0)
    mqttc.publish("/j/led/output/set_raw", "PREV,"    + rainbowString(now + 4*period/5.0), 0)
    mqttc.publish("/j/led/output/set_raw", "RING,"    + rainbowString(now), 0)
    time.sleep(0.04)
mqttc.loop_stop()
With this, I simply periodically set all six LEDs to a fully saturated color and I vary the hue over time independently for each LED to make the colors chase each other (with the ring mimicking the circle). Rainbow mode. Well, my son was less impressed than I expected, but I love it.
We can control it, we can have rules, we are happy. And I have not even tried guessing additional commands yet. I really wonder why I could not find an official documentation of the MQTT protocol. I mean, it allows to integrate the Jooki in pretty much any other setup and I cannot see anything harmful about the MQTT broker10. I certainly now love this device even more than I did before and I am sure that I will make even more use of this interface in the future.
This makes it sound cheap. These figures have a really great build quality and have been put to the test by the teeth of my son numerous times. ↩
This is more a problem for my wife who holds on to her ancient phone that is always low on disk space. ↩
It almost feels too easy at this point. I would not call it a hack but an undocumented feature. ↩
Sounds like lazy writing to anyone not familiar with openHAB or IoT systems with similar terminology. In openHAB everything is structured into “things” (usually representing a physical device), “channels” (the different paramteres that can be controlled on the device) and “items” (actual variables in openHAB that are usually “linked” to channels). ↩
I think it also supports mDNS, but setting up a static address is so simple and reliable that I did not bother to try it. ↩
i.e. a switch in openHAB. ↩
Actually, I did not have a problem with the Jooki being set too loud but too quiet. When my son started using the Jooki he randomly pushed the buttons and sometimes he turned the volume so low that he could not hear anything from the Jooki. Since he did it unintentionally, he could not yet understand that the device is actually playing something and how to fix it. ↩
I have set up the things in his room to a dedicated sitemap. ↩
Unfortunately, I have not found a way to make this permanent. The next track will trigger an LED change that turns the ring LED back on. But at the moment we use a 1 hour calming music track after the bedtime story, so it stays off for quite a while. ↩
I mean, it is a plain music player. You certainly do not want to expose it directly to the internet as someone might play some unwanted stuff to unsuspecting kids. But this also applies to exposing the official web interface and I do not see anything dangerous added by the MQTT broker. ↩