


17 December 2020
Hacking a Sony Alpha for clean HDMI out: On my journey to find the perfect image for video conferences and lectures with a spare DSLM camera I found several solutions to use a Sony Alpha as a webcam - with varying results and obstacles.

The video should give a good overview and examples of what to expect. This articles describes how to do it…
First of all: Why a DSLM instead of a regular webcam? Simple answer: Better image quality. Nominally, you will find many webcams that have the same or even a higher resolution than a normal web conference video stream supports, but the actual image quality is limited by sharpness and noise of the small webcam sensors and optics. Even at the end of 2020 after a year of never ending video chats, people are still surprised by the image quality on my DSLM setup and no artificial depth of focus can match the natural Bokeh of a fast prime lens.
In this post I will talk about a total of four specific cameras, but most of the problems and solutions discussed here should apply to other models from the same generation as well.
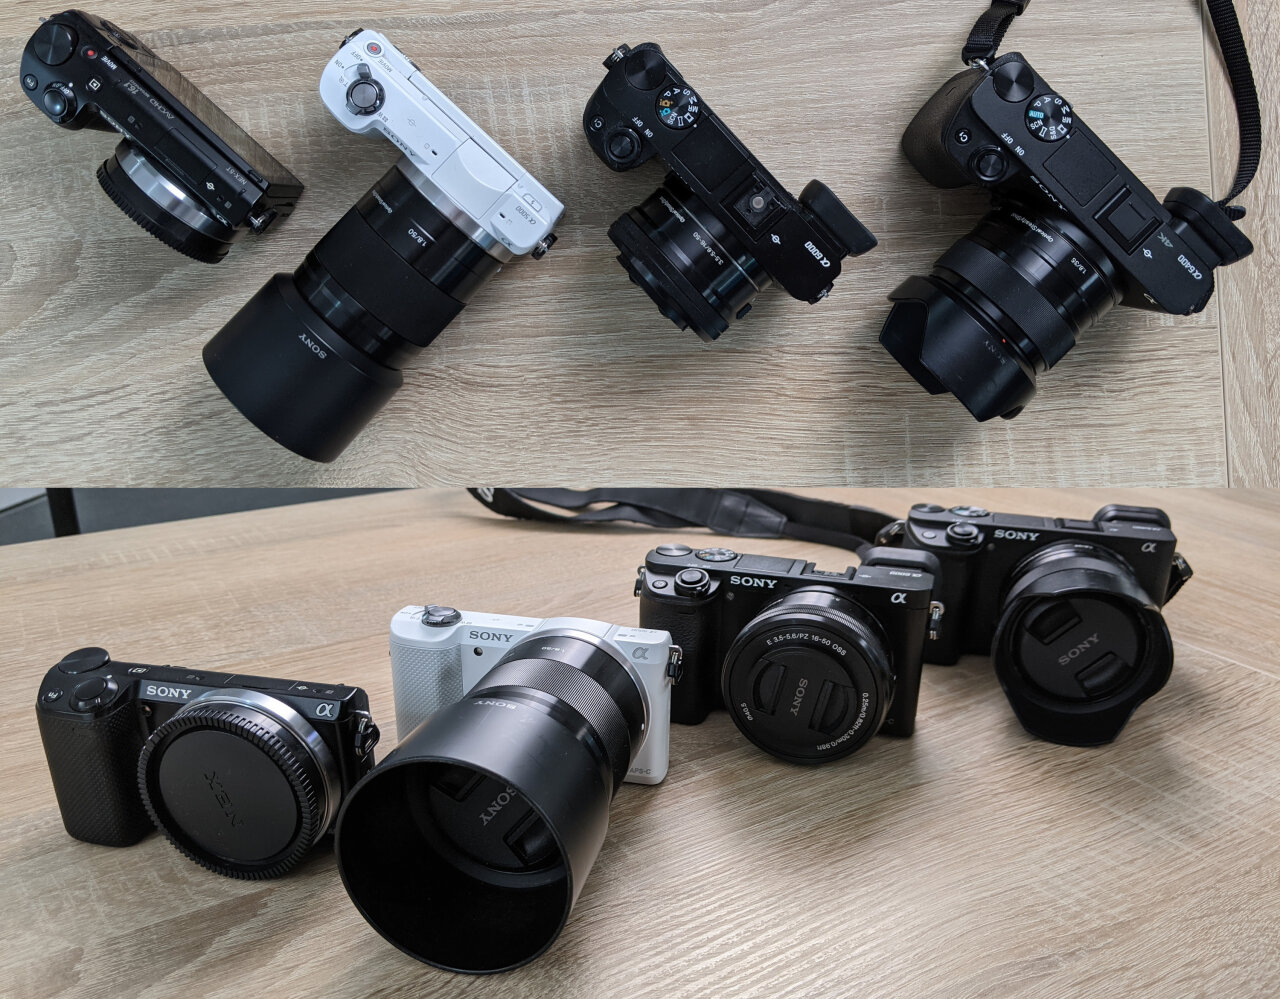
The cameras are:
Sony Alpha NEX-5T
The oldest one, my first DSLM, which retired mid 2019. Since selling would not yield enough cash to justify it, I kept it for projects as I can keep using all my e-mount lenses. For example when using it to create time lapses of my 3d prints.
Sony Alpha 5000
Also an older mid-range model, which I recently bought for around 120€1 specifically to be permanently placed at my PC for web conferences as I hoped that I could apply the techniques explained in this post.
Sony Alpha 6000
This is just my dad’s camera which I borrowed for this post. It is the older APS-C flagship and widely used, so I found it interesting to see what could be done with this model.
Sony Alpha 6400
My beloved2 main camera. Works perfect as a webcam, but I do not want to permanently use it at my work PC. It’s a bit overkill just to be mounted there when it should instead be ready to take pictures of my kids.
Interestingly, there are not two cameras for which I had the same troubles and the same ideal solution. The a6400 is the easiest as there is an official webcam software to use with an USB cable and as it has perfectly sharp clean HDMI out without any problems. The a6000 should in theory at least also have a clean HDMI out, but it suffers from a weird software bug that applies a beauty filter to your face all the time. So does the a5000, which on top does not provide clean HDMI out, meaning the user interface of the camera will always be visible in the image that is sent via HDMI. Finally, the NEX-5T also does not have a clean HDMI output, but it also is incapable of providing an image at a reasonable resolution unless you are actually recording, which has its own limitations.
So, to avoid wasting your time, let me give you an overview of what I will discuss here and what you can expect from each camera:
| Camera | Options | Result |
|---|---|---|
| a6400 | USB with official software (not discussed here) or clean HDMI out with HDMI grabber (only outlined here) | Superb3 1080p image |
| a6000 | Clean HDMI with HDMI grabber, but waxy skin bug needs to be fixed first (discussed for the a5000 and applies to the a6000 as well) | Nice 1080p image |
| a5000 | Clean HDMI needs to be achieved with a hack (detailed explanation here) and the waxy skin bug needs to be fixed (explained here, may require using a different lens) | Nice 1080p image |
| NEX-5T | HDMI out while recording (only outlined) or video stream via Wifi (rough explanation) | Impractical or low quality |
So, let’s start with the two “official” methods that I will not discuss in every detail as there are plenty explanations on the web. Unfortunately, from all the cameras listed here, the a6400 is the only one that supports both properly.
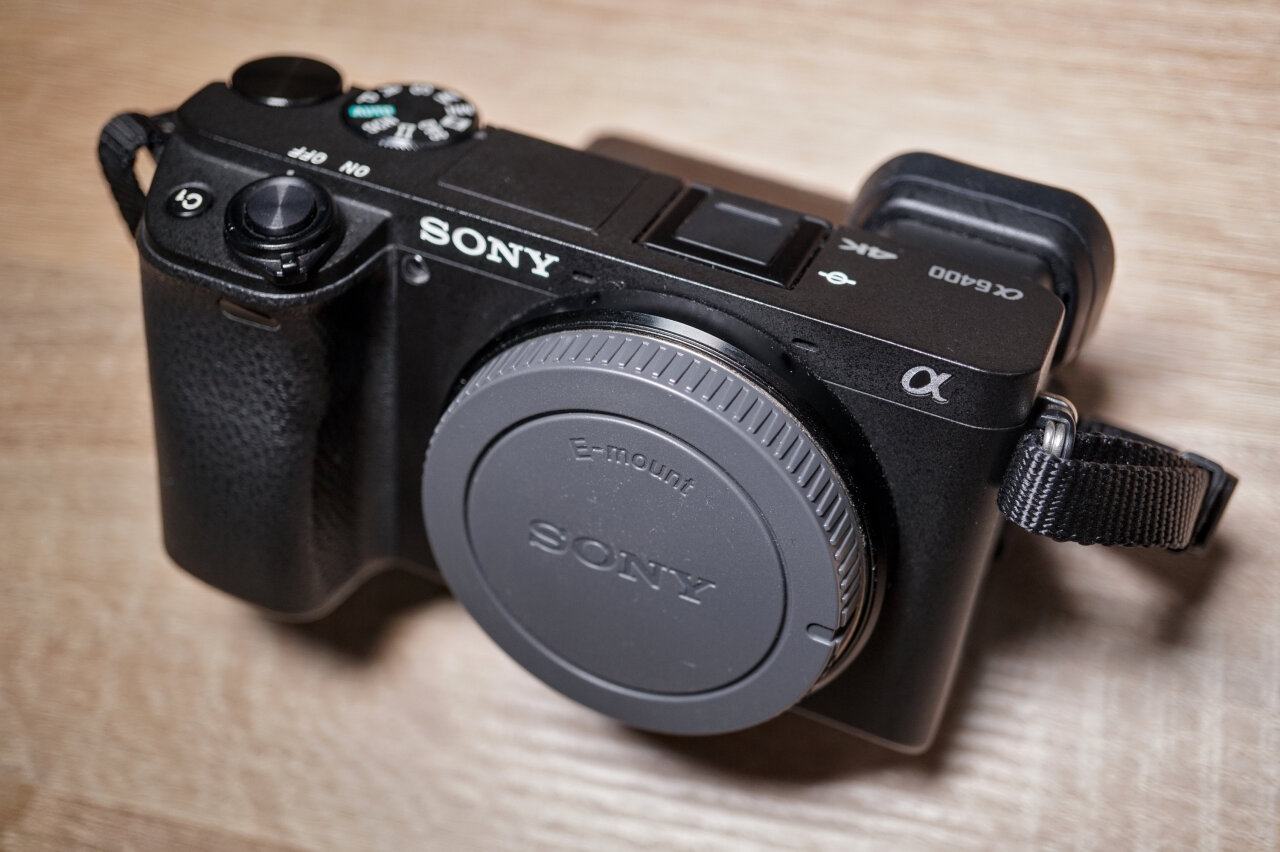
The first one is the Imaging Edge Webcam software by Sony, which allows you to simply plug in your camera via USB and it should be recognized as a webcam. Unfortunately, only the a6400 and similarly new models are supported and since it is not available for Linux, I have not tried it. But if you are on Windows or MacOS and have a modern camera that you want to use, go ahead and try it - it will probably be the easiest solution.
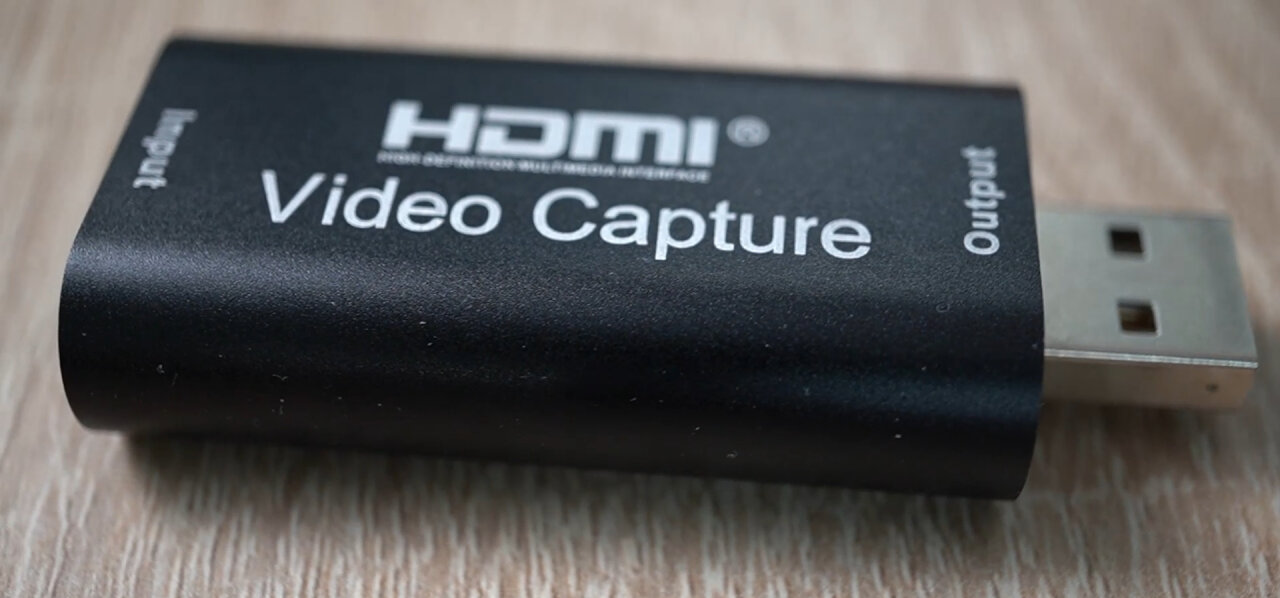
Instead I use a cheap HDMI grabber for 20€ with my a6400. You can just plug it in and since modern HDMI grabbers4 use the USB Video Class (UVC), they are recognized like a webcam without requiring any drivers. I am not 100% happy with the slighty exaggerated colors that this grabber picks by default, but after resetting the colors to a neutral image, the result is more than good enough for any web conference.
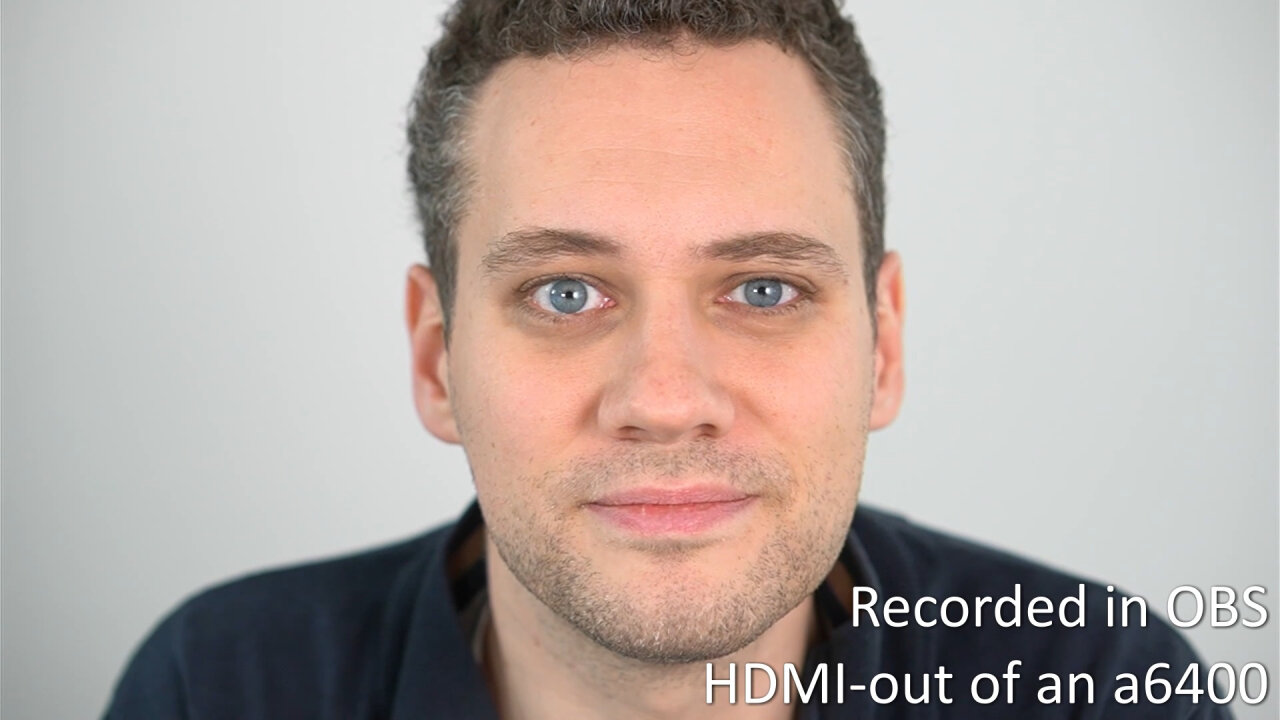
Unfortunately, this approach also only works for the a6400 from my collection of cameras. In theory, you would only need an HDMI output and the option to output a clean image, meaning that the camera interface is not sent to the HDMI output, but only the raw image. Nominally, the a6000 should be able to do that, but unfortunately it suffers from the “waxy skin effect”, a bizarre bug that applies an exaggerated beauty filter to any face, even if you disable the function in the menus.
Fortunately, I found an workaround to this and a hack to disable the user interface on the a5000, so in the end I am using the a6000 and the a5000 with an HDMI grabber as well.
One aspect of “using a Sony Alpha” for web conferences is actually getting the image into the web conference software. If you are using a UVC compliant HDMI grabber, it is probably recognized by the software as a webcam and you do not need anything else. However, if this is not the case or if you need to get your video stream from a different source (like the stream over wifi as explained for the NEX-5T below) or if you want to switch between different streams, apply filters or show multiple streams at once (like the example at the beginning of the video for this entry), you might want to check out Open Broadcaster Software, better known as OBS.

This software is designed for video streams to various platforms like Twitch, but there are plugins to redirect its output to a virtual webcam 5. The only problem I encounter regularly is that while most web conference software (Zoom and various browser-based solutions) accepts a 1080p stream, Microsoft Teams would not accept anything beyond 720p, so I have to switch the resolution in OBS after using the best quality in Zoom and then taking a call on Teams.
The reward for this extra step is that I can set up a second camera for presentations in which I show experiments6 on my desk or when I find it nicer to have a desk scene to greet the audience before switching to a close-up cam that shows just my face as an overlay to some slides.
So, while I demonstrate everything in this article with OBS, it is not strictly required if your HDMI grabber is directly recognized - but it is highly recommended.
So, the first candidate as a webcam to free up my a6400 was my old NEX-5T, which I did not really use anymore. Unfortunately, the image from the HDMI output is horrible in every way. It has a user interface and it has a very low resolution. In contrast to the other models discussed here, it also does not have a dedicated video setting on the mode dial, but instead you are just supposed to hit a video record button in any mode. The idea is nice, but besides being thoroughly annoying when you shoot pictures in 3:2 and need to frame your 16:9 video with the 3:2 picture-preview before you hit the button, this also means that you cannot switch to video mode (which vastly improves the HDMI quality on the other cameras) without actually recording anything.
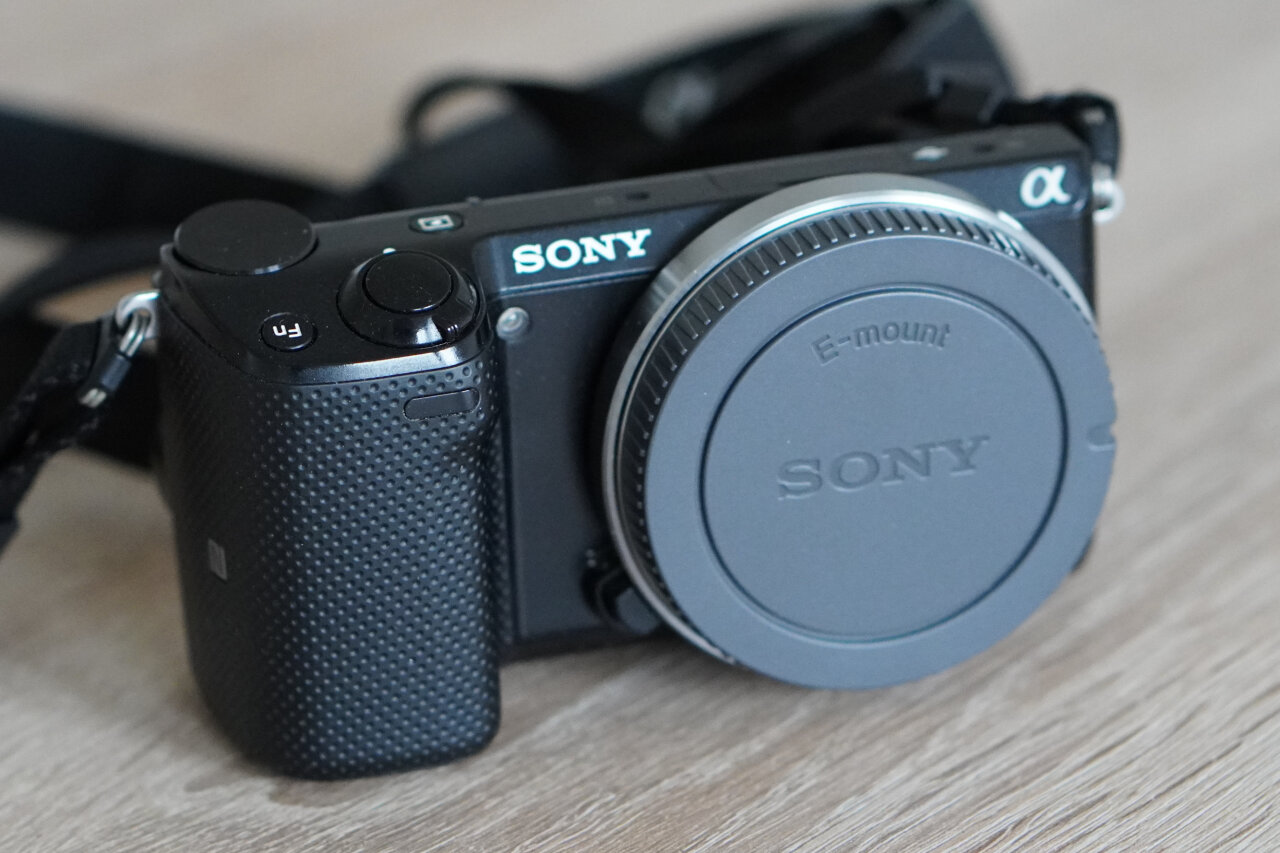
In fact, the NEX-5T creates a nice image at the HDMI output if you are recording, but that is not a practical solution for three reasons:
So, I tried a different approach. I had already been playing with the REST API on that camera when I used it to create time lapses of 3d prints in Octoprint and I know from the official Imaging Edge app that there is actually a live stream available from the camera which serves as a preview to frame your shots in your phone. So, after having a look at the official documentation by Sony, I realized that it is not too hard to activate the live view function and to retrieve the stream. In fact, there are two simple API calls required: startRecMode to establish the API session and startLiveviewWithSize to request the live stream.
If you are on Linux (and probably also on MacOS?), I would recommend using curl for this as follows:
1
2
curl -X POST -d '{"version":"1.0","id":1,"method":"startRecMode","params":[]}' 192.168.122.1:8080/sony/camera/
curl -X POST -d '{"version":"1.0","id":1,"method":"startLiveviewWithSize","params":["L"]}' 192.168.122.1:8080/sony/camera/
If you are on Windows, search for a tool (or browser plugin) to send POST requests.
The camera will respond with an URL that you can directly throw into OBS as a media source. Unfortunately, even though I am using the startLiveviewWithSize to explicitly request the high resolution stream (parameter L), the stream still has a rather low resolution and the frame rate suffers immediately if the Wifi connection to your camera is not 100% perfect.
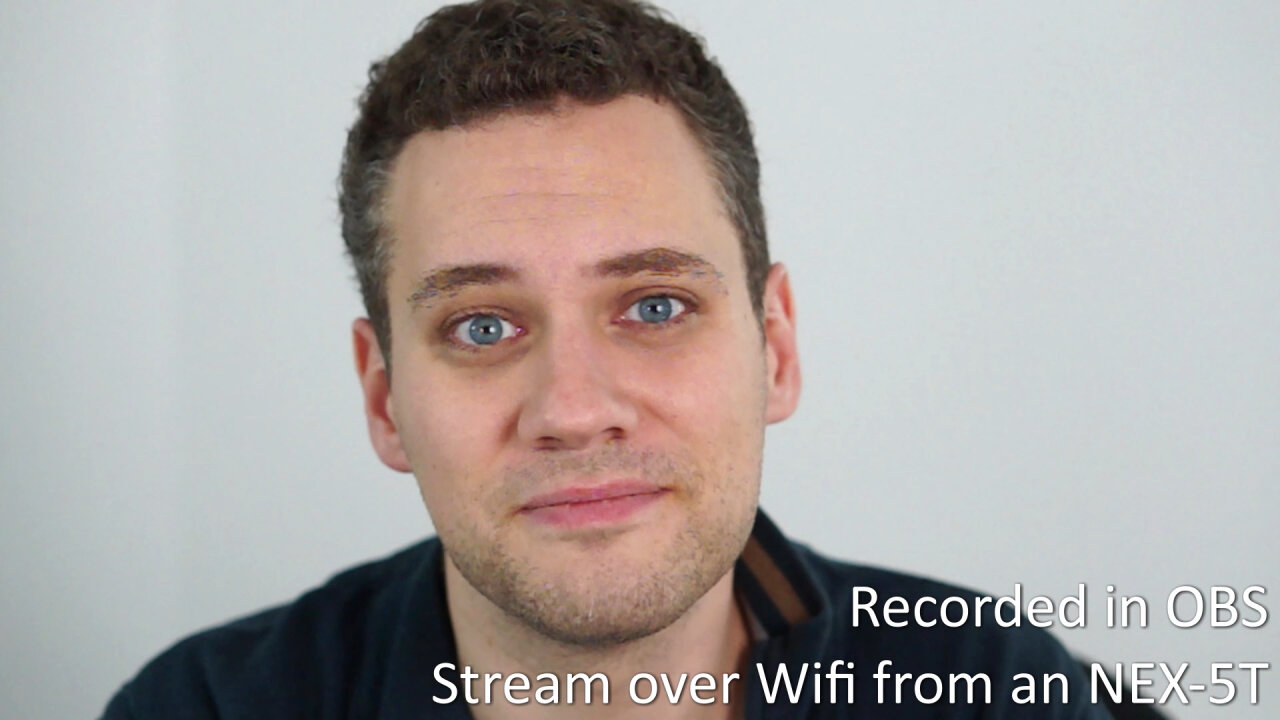
So, this was not a practical solution and certainly not superior to a regular webcam.
While I put a lot of time into trying to get something useful out of the NEX-5T without success, I stumbled onto an interesting comment by “mischa85” on how to enable clean HDMI out on an a5000. Of course, I tried that on my NEX-5T and I compared several memory dumps to find other memory locations that might be helpful, but except for some interesting UI elements to take stereoscopic 3D images (which the NEX-5T does not support), I was only able to remove some but not all of the user interface.
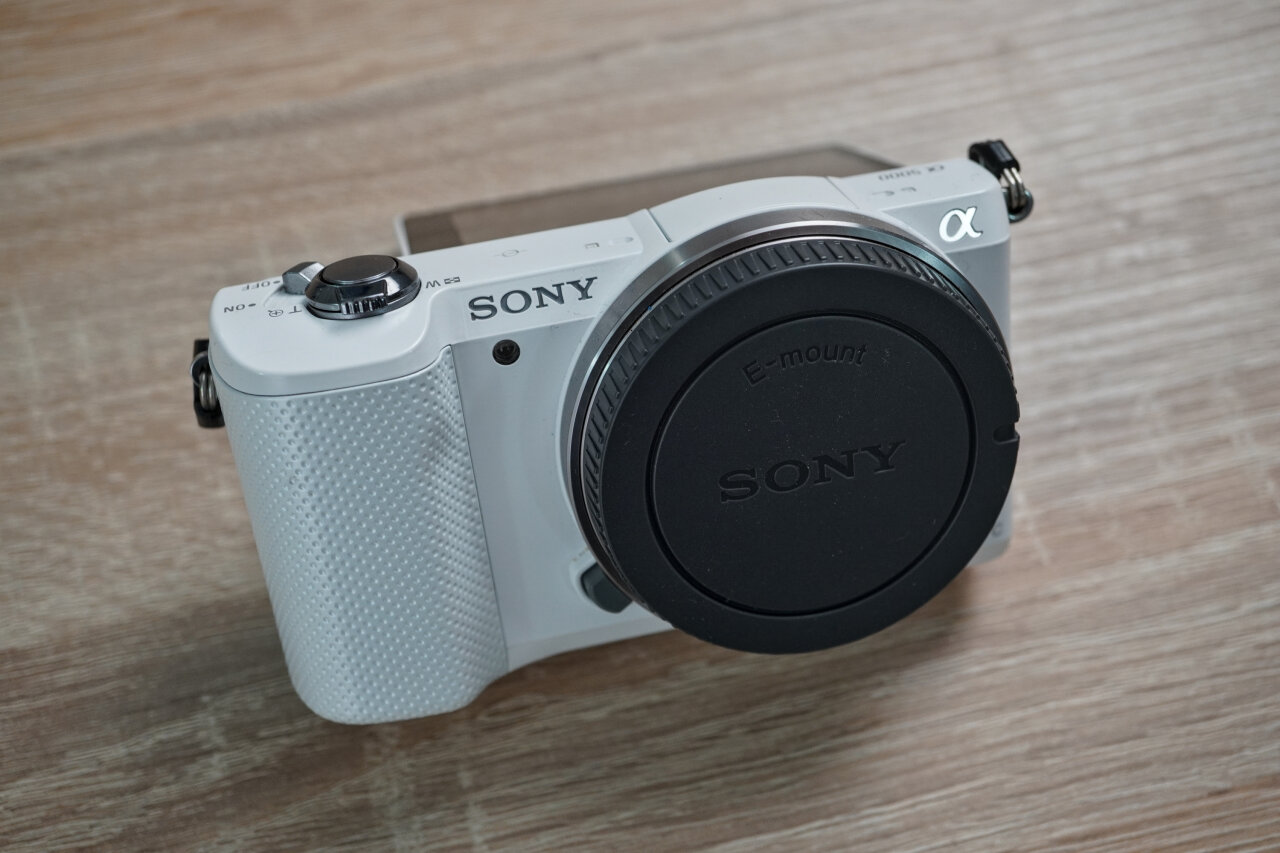
Still, as I had several web meetings per day and became more and more annoyed that my camera spent most of the time at my desk than near my family, I needed a solution and started to look into good webcams or cheap used DSLMs that I could use with my lenses. And here the hack by “mischa85” became very interesting: If it worked, it would add the a5000 to my list of camera candidates and I found a heavily used8 one for 120€. The next cheapest camera with official clean HDMI would have been the a5100 for at least 200€.9
So, I decided to give the hack a try and ordered the cheap a5000. I plugged it into the grabber and the first impression was not a strong one:
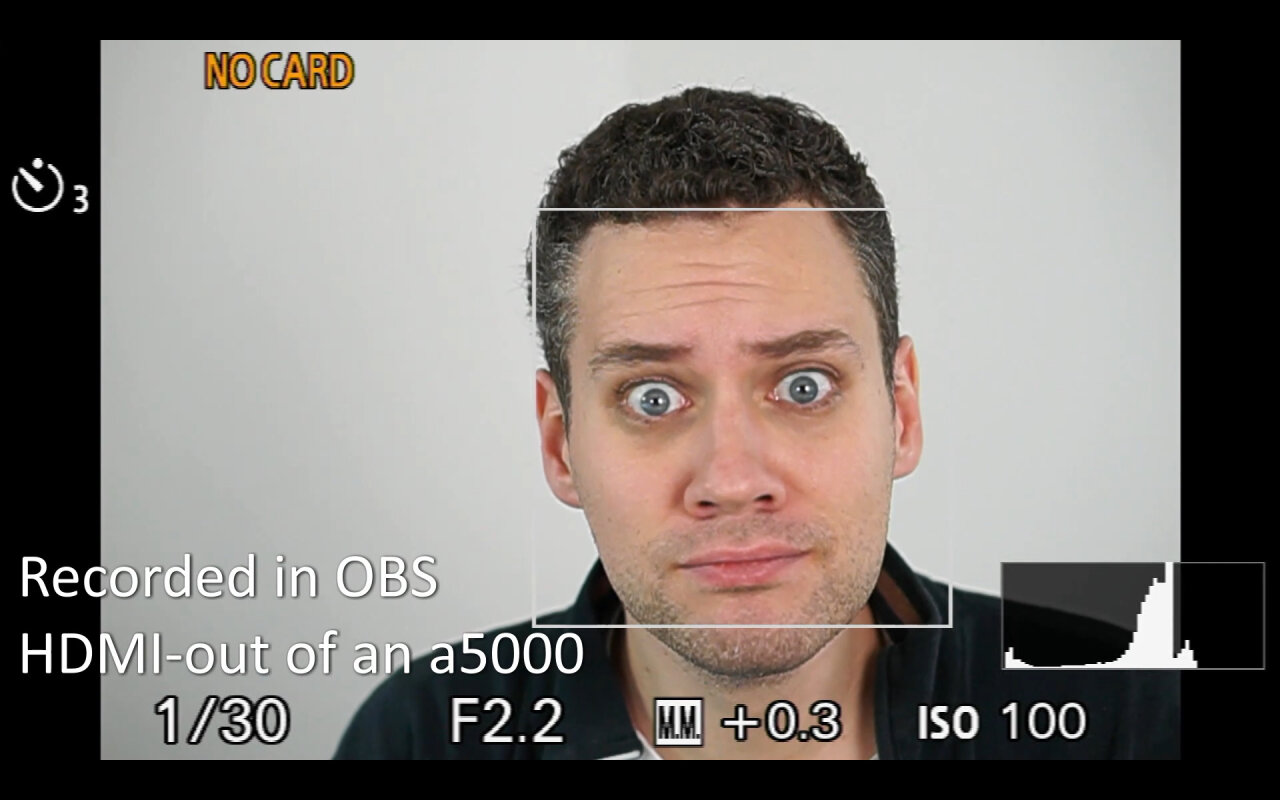
So, the most obvious problem is not the user interface but the terrible resolution of the image, which is similar to what you get from the NEX-5T from its HDMI out. However, the a5000 has a massively underrated feature: There is a video mode on its (virtual) mode dial. Not only does it switch to the correct aspect ratio without the need to change the aspect of still images, but more importantly the HDMI output suddenly supplies a perfectly nice image:
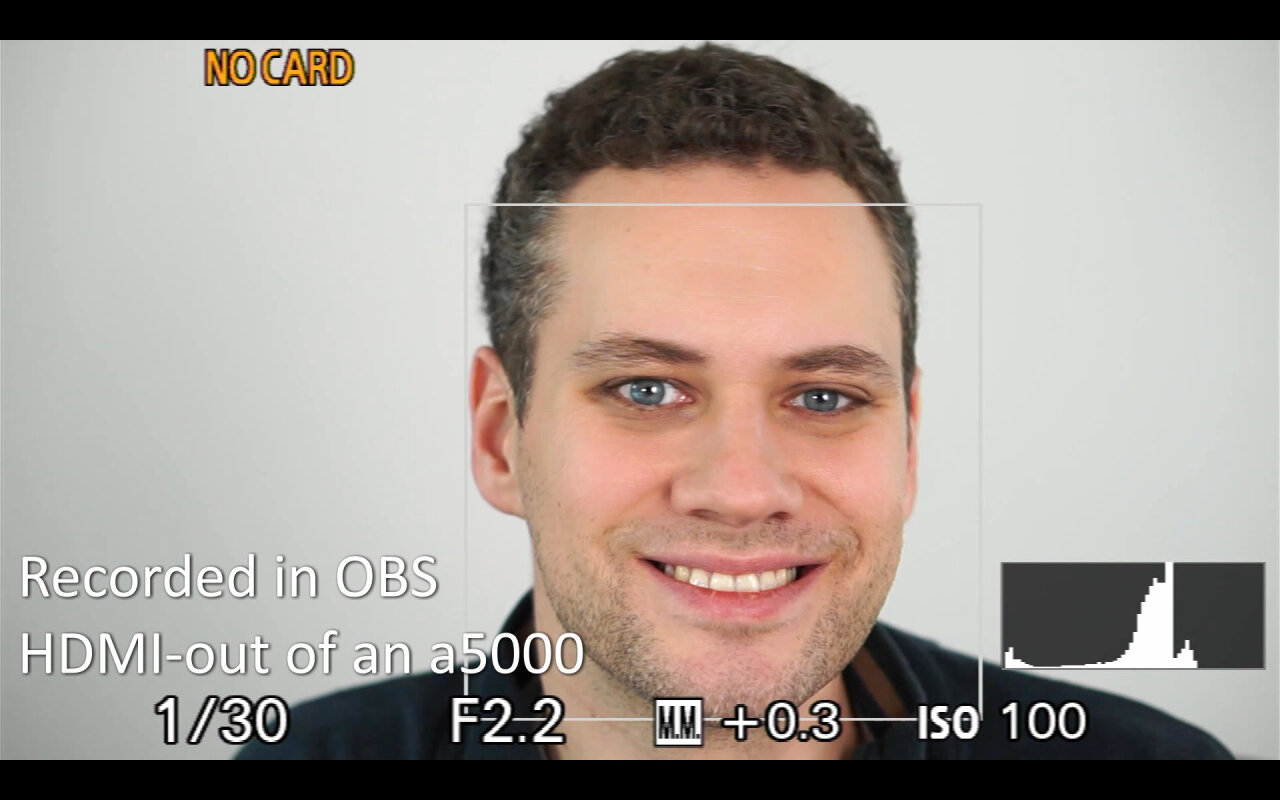
As I mentioned before, I stumbled onto a solution to get clean HDMI out on the a5000 in a comment by “mischa85” while researching options for my NEX-5T. But to understand his suggestion, we need some context and some software.
His comment was actually an answer to a request on github in the issue tracker of the OpenMemories-Tweak app, where someone was asking for exactly this feature. The OpenMemories-Tweak app is an unofficial app for Sony cameras with a PlayMemories App Store that allows for a range of neat hacks, like turning of the video recording limit, enabling additional languages and starting a telnet server on the camera. The latter means, that you can log into a command line interface on your camera and get access to pretty much the entire system including tools to change the part of the camera’s memory that stores its settings. Mischa85 found a location in this memory with which you can enable clean HDMI out. So let’s have a look at the exact steps that you need to enable this…
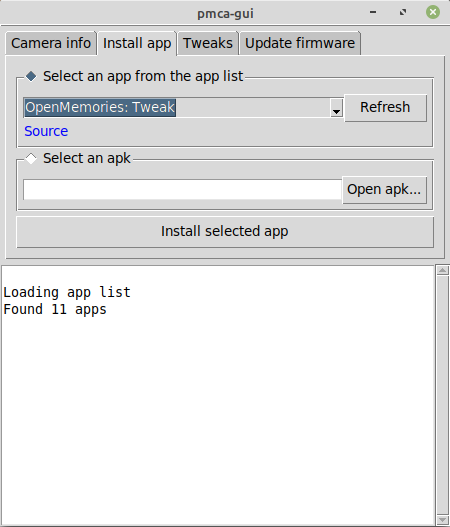
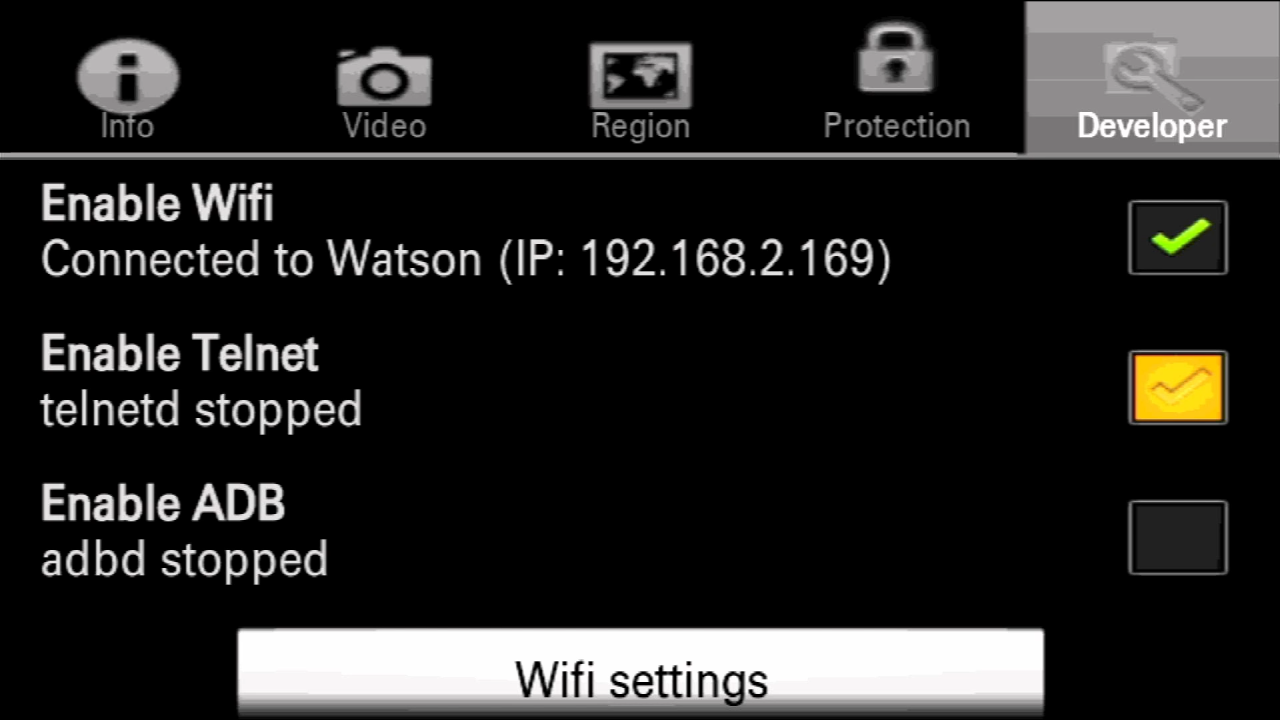
telnet 192.168.2.169 into a terminal. On Windows I recommend to use PuTTY: Just get the putty.exe (the installer is not necessary), launch it, enter the IP address, select telnet and hit open.bk.elf r 0x01070a47 and hit enter. The camera should respond with 01,bk.elf w 0x01070a47 00 (note the “w” instead of the “r”) and the response should end on data:00,.bk.elf r 0x01070a47 again and the camera should respond with 00,.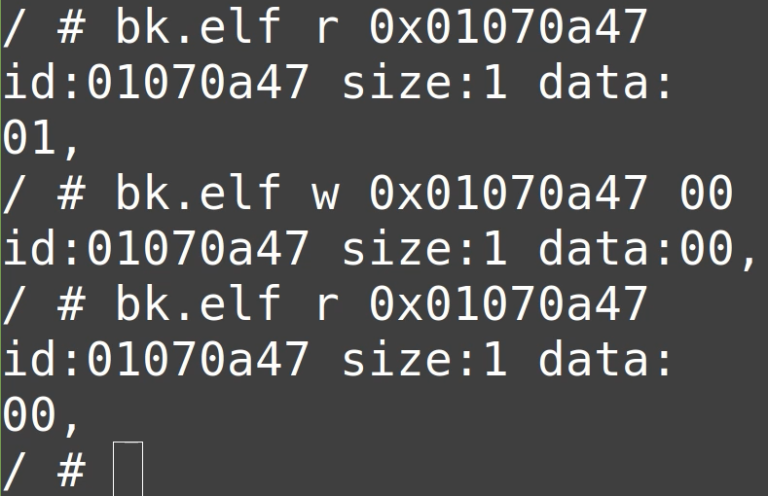
Actually, step 6 and 8 are optional. They just read the location in memory, so you can verify that it starts with the default of 01 and that you then successfully changed it to 00. Step 7 is where you actually change something, but tt is nice to have this verification.
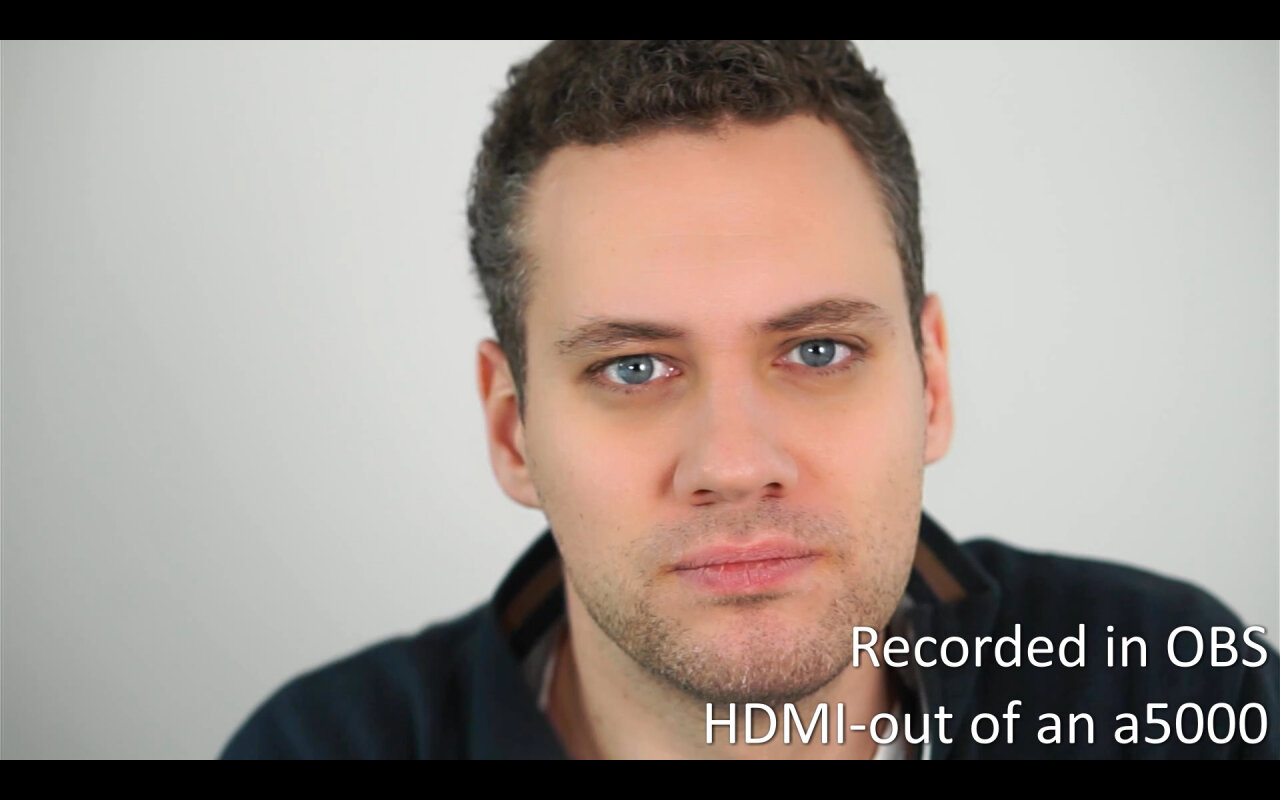
Now, this looks a lot better. Except… If you look at the image for a second time, you notice that my skin looks all weird. It is strangely uniform and has an unnatural wax-like appearance. This is what is known as the “waxy skin effect” or maybe “waxy skin bug” would be a better name for it.
By the way, welcome back a6000 users who searched the article for “a6000”. This is where you should continue reading as your camera has clean HDMI out, but suffers from this exact problem.
The thing is that the Sony cameras from that generation (I think some A7s are affected as well) have a feature to apply a beauty filter to your skin. Of course, there is a setting to disable such a stupid feature, but unfortunately this setting does not do much. If you disable it, the effect is still applied in your video recording, which is why you find several discussions about it on the web. Luckily, there is a solution that is good for most users. As demonstrated here, if you disable face detection the effect is gone in your video recordings.
Unfortunately, this did not help me. For one thing, this only works in the recording, but the problem is still there if you are not recording. So it would be pretty much the same situation as with the NEX-5T where I need to record to get a good image. But also, it means that you lose face detection, which is pretty helpful if you want to shoot your face with a shallow depth of field.
So, this was pretty depressing after I got so far with my new used a5000. Since the NEX-5T was not affected by this problem and the a6400 luckily isn’t either, I had never heard of this before, but I would probably have had the same issue with an a5100. Most users were happy with turning off face-detection as they are not recording from HDMI out but only care about the internal recordings of the camera, which are fine with this setting.
In despair I tried pretty much all the settings and functions of my camera in the hope to find something that would also affect this setting in some way and found… Clear Image Zoom. Oh, oh. That does not sound desirable, does it? Don’t worry, Clear Image Zoom isn’t too bad - it is not digital zoom, which you want to avoid at all cost as it just blows up your pixels after they have been recorded, effectively cropping your image to a smaller resolution. But Clear Image Zoom does not zoom after recording, but takes advantage of the fact that the sensor has a much higher resolution than your recorded image. When recording 1080p, the 1920 horizontal pixels are spread across the entire 5456 pixels of the sensor. If you use clear image zoom, the camera simply spreads these 1920 across a smaller section of the sensor and is still able to provide the full 1080p resolution11.
So, Clear Image Zoom is rather ok if you do not overdo it and the thing I noticed is that the waxy skin bug is gone when it is engaged even a tiny bit. Maybe the camera cannot handle processing the Clear Image Zoom and the skin smoothing at the same time or maybe it just has not been implemented for this combination. Whatever the reason, this is the solution I was looking for. Screw on a prime lens12 with a focal length slightly shorter than what you want to use and engage the Clear Image Zoom to the lowest possible factor of 1.1 and you get a beautiful image from the a5000 (or a6000 or a5100 or …) from its HDMI out.
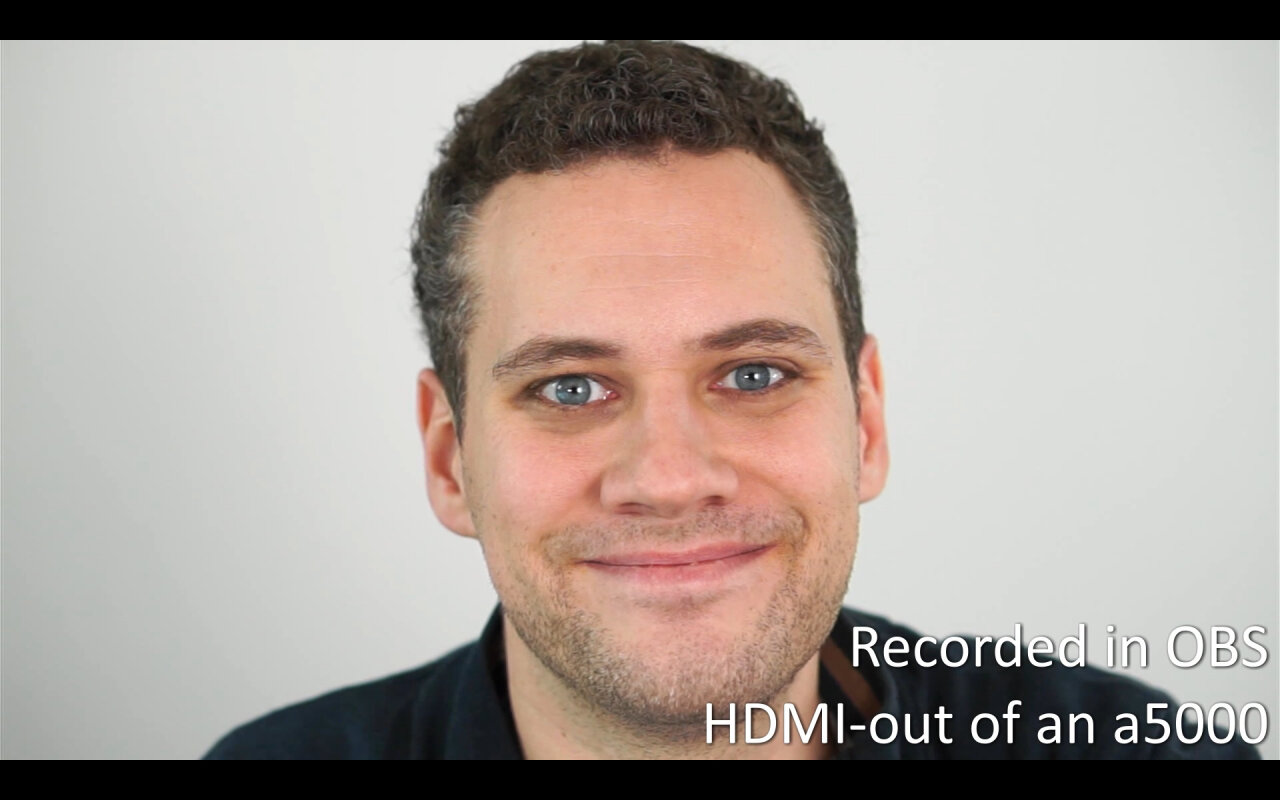
By the way, if any of you ever finds a more elegant way to fix the waxy skin effect, I would be happy to learn about it.
Starting with the obvious, it is great to have a modern camera like the a6400 with simple and high-quality solutions to use it for web conferences and at the other end, using anything from the NEX series is not a workable option. In-between is where it gets interesting. If you have an a5000, a5100, a6000 or any camera from around that era, you probably found something in here that turns them into a perfect webcam (with a 20€ HDMI grabber) as you tackle the user interface and/or the waxy skin bug.
Also, if you are looking into buying a new camera just for video conferences, the a5000 is a very interesting cheap option, especially as its non-official clean HDMI means that only few people are looking at this camera during the ongoing pandemic. But remember, that this price was for a heavily used body without a lens, so if you are not already in the Sony ecosystem and do not plan on using one of your existing lenses, this option becomes less attractive as you also need to plan for buying a lens that is worthy of using a DSLM over a regular webcam.
Oh, and speaking of the improved look of the DSLM: Do not think that the image is only determined by the camera itself. Lighting is extremely important and while framing may be not too relevant in a frontal headshot for a web conference your background still counts. In my examples I am using a large umbrella as a key light and a smaller LED panel to even out the dark side of my face (not interested in a cinematic look in my work context). So, if your coworker is in a nice bright room with a subtly professional backdrop, his cheap webcam will easily outperform your DSLM in a badly lit basement with a glaring red backdrop. On the other hand, if you only get it remotely right (I could certainly learn a lot from a professional photographer/videographer), the image will stand out so clearly that people will ask you about it.
Heavily used and without a lens or any other accessories. ↩
Totally unrelated: I indeed love this camera, especially that eye autofocus. But did you notice from the pictures how much bigger the a6400 and the a6000 are compared to my old NEX-5T? I really miss its small size, especially when you just mount a small lens to carry it without a camera bag. I don’t think that I am going full frame anytime soon… ↩
Although all cameras mentioned here can provide a 1080p video stream from a sensor with much higher resolution, the a6400 provides a visibly sharper image due to superior oversampling (i.e. taking a high res image and downsampling it to 1080p, i.e. taking more pixels into account than necessary). Not that it would matter after squeezing it through the video stream of a Zoom conference. ↩
I am not 100% sure, but cheap grabbers might even be an advantage here as they avoid requiring any driver to reduce cost. A very advanced grabber might implement some specific functionality that might not be compatible with the raw standard USB webcam drivers. But that is something you need to figure out for each product. In the end, if you find that UVC is supported, you should have no trouble and no driver-wrestling. ↩
For Windows and MacOS there is a version of the plugin “OBS VirtualCam” (not tested by me, but there seem to be many users). On Linux there is the plugin V4L2 loopback, which (as the name suggests) uses the video4linux loopback device. ↩
Recently, I had a talk for an audience from the Philippines in which I demonstrated radial acceleration using my son’s balance bike. So, I suited up at 1:30am (timezones are weird), went into my basement (home office is weird) and had nearly 200 people from the other side of the world watching me play with my son’s balance bike (my job is weird). ↩
Finally, the a6400 does not have this limitation, but otherwise this is really bizarre and most cameras have that limitations to be able to be marketed a bit cheaper. I think that this started to change as more and more vloggers use DSLMs for videography. ↩
Most of the heavily used models had scratches or stuck pixel lines on the display, which does not really matter when using it as a webcam. ↩
I wonder if there is a direct link between these prices, clean HDMI out and the COVID19 pandemic. Maybe I am overthinking this, but I do not see much demand and any massive differences in features between these older camera models that warrants such a price difference. But if you are looking for a webcam, the a5100 is a simple and decent solution while the a5000 is completely irrelevant unless you know about the hack. ↩
Sony-PMCA-RE stands for “Sony PlayMemories Camera Apps Reverse Engineering project”. ↩
Still, you should prefer optical zoom whenever you can. This effectively changes the crop factor of your camera as the sensor acts as if it was a smaller sensor. Also, even if you still nominally have the full resolution, the camera’s options for supersampling the image get more and more limited (not sure what the a5000 does here) and the color resolution of the Bayer filter drops below your output resolution. (Those are just the disadvantages I can think of right away.) ↩
Of course a zoom lens works as well, but you cannot engage the Clear Image Zoom before you have reached the end of the optical zoom. So, unless you are using a wide angle zoom, you will be near 60mm (remember that those APS-Cs have a crop factor of 1.5), which is a bit too close for typical webcam scenarios with the cam peaking out from behind your screen. ↩